How to Build a Media Wall with an Electric Fireplace and TV
Media walls have become a popular way to transform living rooms into stylish entertainment hubs by combining an electric fireplace and TV into one stunning focal point. This project not only enhances your room’s aesthetic appeal but also improves functionality by managing cables and maximising space.
Building your own media wall offers a cohesive design that reduces clutter and creates a spacious, organised feel. Whether you have an existing chimney breast or need to build a stud wall from scratch, this guide covers the essentials to help you create a luxury media wall that fits your home perfectly.
Key Points
- Media walls integrate electric fireplaces and TVs to create a striking entertainment wall.
- Choose between electric fire inserts or wall-mounted options based on your skills and design goals.
- Stud walls built with 75mm x 50mm timber framing and plasterboard are the most common media wall build method.
- Plan electrical outlets carefully, with at least two plug sockets hidden within the wall for the fireplace and TV.
- Maintain proper clearance between the electric fireplace and TV to avoid heat damage.
Planning Your Media Wall Build
The first step is to assess your space and determine whether there is an existing wall that can be used for the media wall, or if you need to build a new stud wall from scratch. An existing wall can provide natural support and simplify installation, while a new stud wall offers greater flexibility in terms of size and placement for both the TV and electric fireplace.
_57877.webp)
Aim to position your media wall in a central location on the main wall to ensure optimal viewing angles from various seating areas and create a balanced look. Consider how much floor space the media wall will take and how it affects furniture layout and traffic flow.
Check the locations of existing plug sockets to minimise rewiring. Plan for enough plug sockets to power your electric fireplace, media wall TV, and any additional entertainment devices. Concealing cables inside the stud wall will keep the installation clean and professional.
Decide if you want a recessed (built-in) or wall-mounted installation for both the fireplace and TV. Recessed options create a smooth finish that sits flush with the wall but require precise framing and measurements. Wall-mounted options are easier to install but project slightly from the wall surface.
Choosing Your Electric Fireplace
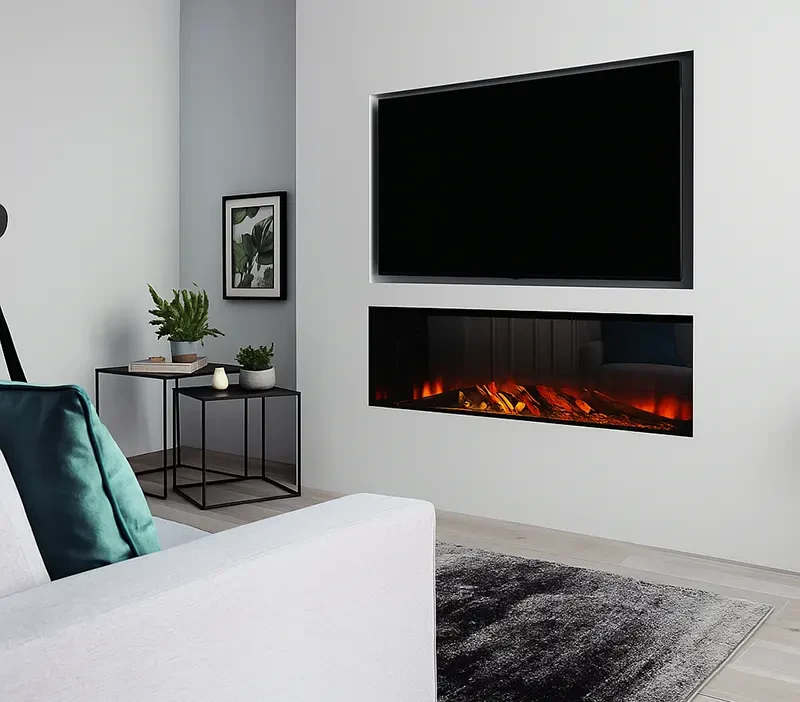
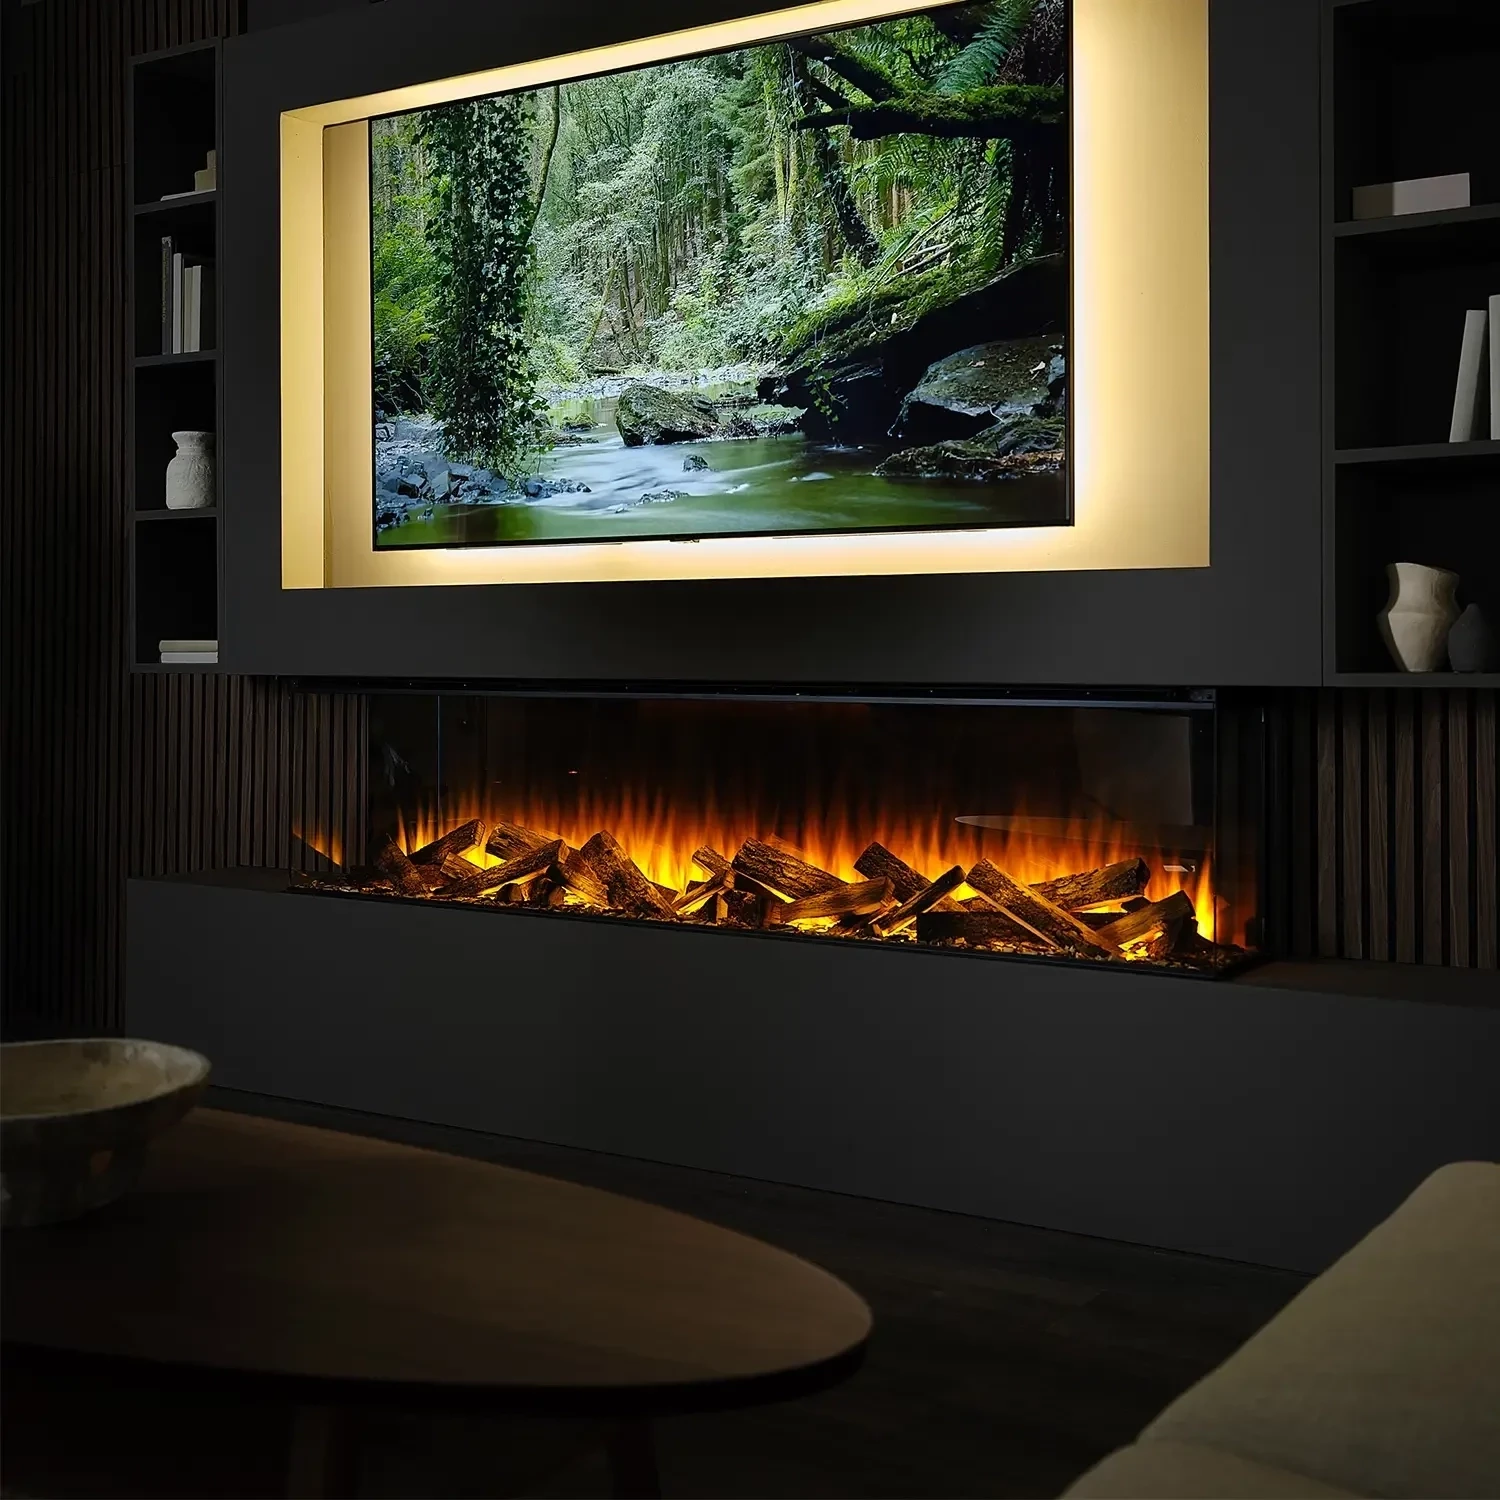
Electric fireplaces are the centrepiece of your media wall. Brands like ArtiFlame, British Fires, Dimplex, ScandiFlames Electric, Tagu, and Trimline Fires offer built-in electric fires that provide a sleek, flush finish, integrating seamlessly into your media wall. They come in various sizes to fit different wall dimensions.
Wall-mounted electric fireplaces from these brands provide easier installation with mounting brackets while still delivering impressive flame effects. Multi-sided models work well for open-plan spaces, allowing viewing from multiple angles.
Most media wall electric fireplaces provide up to 2kW of heat output, sufficient for typical living rooms, with flame-only modes for year-round ambience without heat. Choose fuel bed options like silver birch log effect or crystals to match your room’s décor and add a real touch of style.
Selecting and Positioning Your TV
Measure your TV carefully, including width, height, depth, and weight, to ensure it fits your media wall recess or mounting system.
Ensure your stud wall can support the TV’s weight by mounting brackets directly into vertical studs. Maintain manufacturer-recommended clearance (usually 30-45 cm) between the TV and fireplace to prevent heat damage.
Choose between recessed TV installation for a flush look or wall brackets (fixed or extendable) for flexibility in viewing angles and cable access.
Materials and Tools Needed
Use quality timber framing (75mm x 50mm or 100mm x 50mm) to build a sturdy stud wall. Plasterboard is the most common cladding material, providing a smooth finish ready for paint. Alternatives include MDF panels or engineered stone for a more luxurious look.
Secure mounting brackets, wall plugs, and screws rated for your equipment’s weight are essential. Electrical supplies should include in-wall rated cables, appropriate boxes, and cable management accessories.
Tools needed include tape measures, spirit levels, saws, drills, stud finders, and screwdrivers.

Building the Stud Wall Framework
Start by marking the media wall position using a tape measure and spirit level. Install a head plate at ceiling level and a foot plate at floor level, securing them properly.
Add vertical studs spaced appropriately (usually 400mm centres) and horizontal noggings to provide extra support and mounting points for the fireplace and TV.
Cut precise recesses for built-in fireplaces and TVs, ensuring they fit flush with the finished wall surface.
Verify all dimensions and ensure the framework is level and square before proceeding.
Electrical Installation and Safety
Plan socket locations to hide plugs behind the TV and fireplace or inside the media wall. Use nail-in cable clips to route cables cleanly inside the stud wall.
Have dedicated circuits for your electric fireplace and TV to prevent overloading. Use electrical boxes designed for stud walls and ensure all work complies with local building codes.
Testing all electrical connections before wall cladding is essential to avoid costly repairs later.
Installing the Electric Fireplace
Follow the manufacturer's instructions carefully. Mount brackets securely to studs or noggings to support the fireplace’s weight.
For built-in models, ensure a flush fit by verifying recess dimensions. Complete electrical connections safely with professional help.
Test all fireplace functions, including heat and flame effects, before finishing the wall.
TV Mounting and Integration
Locate studs behind the wall to securely attach TV brackets. Choose fixed brackets for a flush look or extendable brackets for cable access and angle adjustments.
Route cables through the wall cavity using grommets or brush plates to maintain a clean finish.
Test all AV equipment before completing the wall installation and verify viewing angles and height for comfortable use.
_48028.jpg)
Finishing and Cladding the Media Wall
Attach plasterboard or alternative cladding to the stud frame, cutting accurately around recesses and outlets.
Tape, compound, and sand joints for a smooth finish ready for paint or other finishes.
Add trim such as skirting boards or crown moulding to match your room’s style and cover gaps.
Inspect the finished surface for imperfections and test equipment operation one last time.
Alternative DIY Solutions
If building a stud wall is too complex, consider flat-pack media wall kits or pre-built media wall units for easier installation.
Modular systems offer customisation with simplified assembly, while professional spray-finished options provide high-quality finishes without DIY painting.